CLIENT USEr guide
How to Verify your clients
One Click Verify is a digital verification solution – assisting you in meeting your KYC / AML & CTF compliance and regulatory obligations, as part of a digital onboarding process – this can integrate with Iress Xplan to provide a One Click solution.
CONTENTS
How to Get Started
Verifying Information
Express Passport Verification using NFC
Biometrics Authentication
How to Get Started
One Click Verify simplifies the process of identity verification with its straightforward setup process.
You can start your verification by accepting the email invitation to set up One Click Verify. This email has been initiated by an associated business as part of your onboarding journey.
Another potential method a business may use to invite you is by supplying a direct link in communications. It is up to you to trust the direct communication with the associated business.

Verifying Information
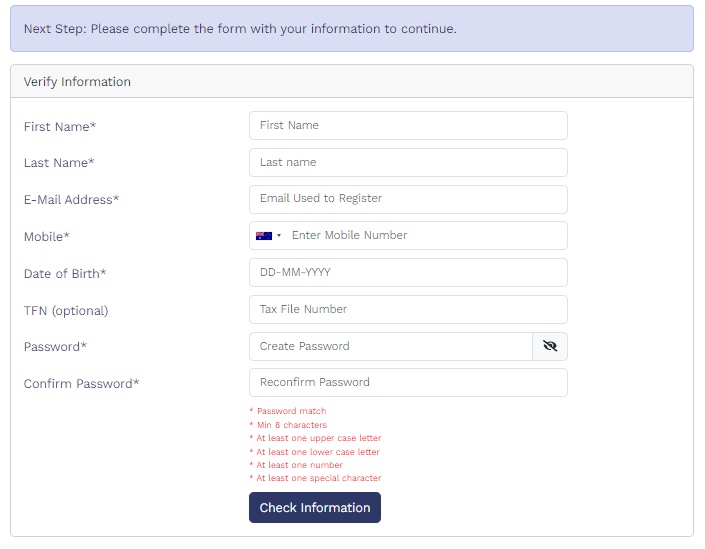
Enter the required information as shown in the section below to register. To pass you must enter the same details as supplied by the business inviting you, matching your identity documents. In the case you do not have a first name, please repeat your last name in the first name field.
For security reasons, you are only able to create one account on the platform. If this account is required for multiple business, following the link will simply map you to another business.
After completing the registration of your One Click Verify account you will need to login using your email and password previously set up during registration.
One Click Verify utilises multi factor authentication via verification codes from your registered email.
If you have changed your email and not updated your One Click Verify profile you will need to contact one of your business administrators to update your details.
Verification Pathways
Verification can be done by Express Passport method OR by Manual Method. *
If you are utilising the Express Passport Method and encounter any issues, please cancel the process and return to the web view to complete the Manual Method.
* Note: Documents required may be different business to business depending on that business’ requirements.
Express Passport Verification using NFC
(Near-Field Communication)
To complete your identity verification on One Click Verify mobile app, ensure you have the following:
- A valid passport with a chip (ePassport)
- A smartphone with front camera and NFC reader
- The One Click Verify mobile app installed
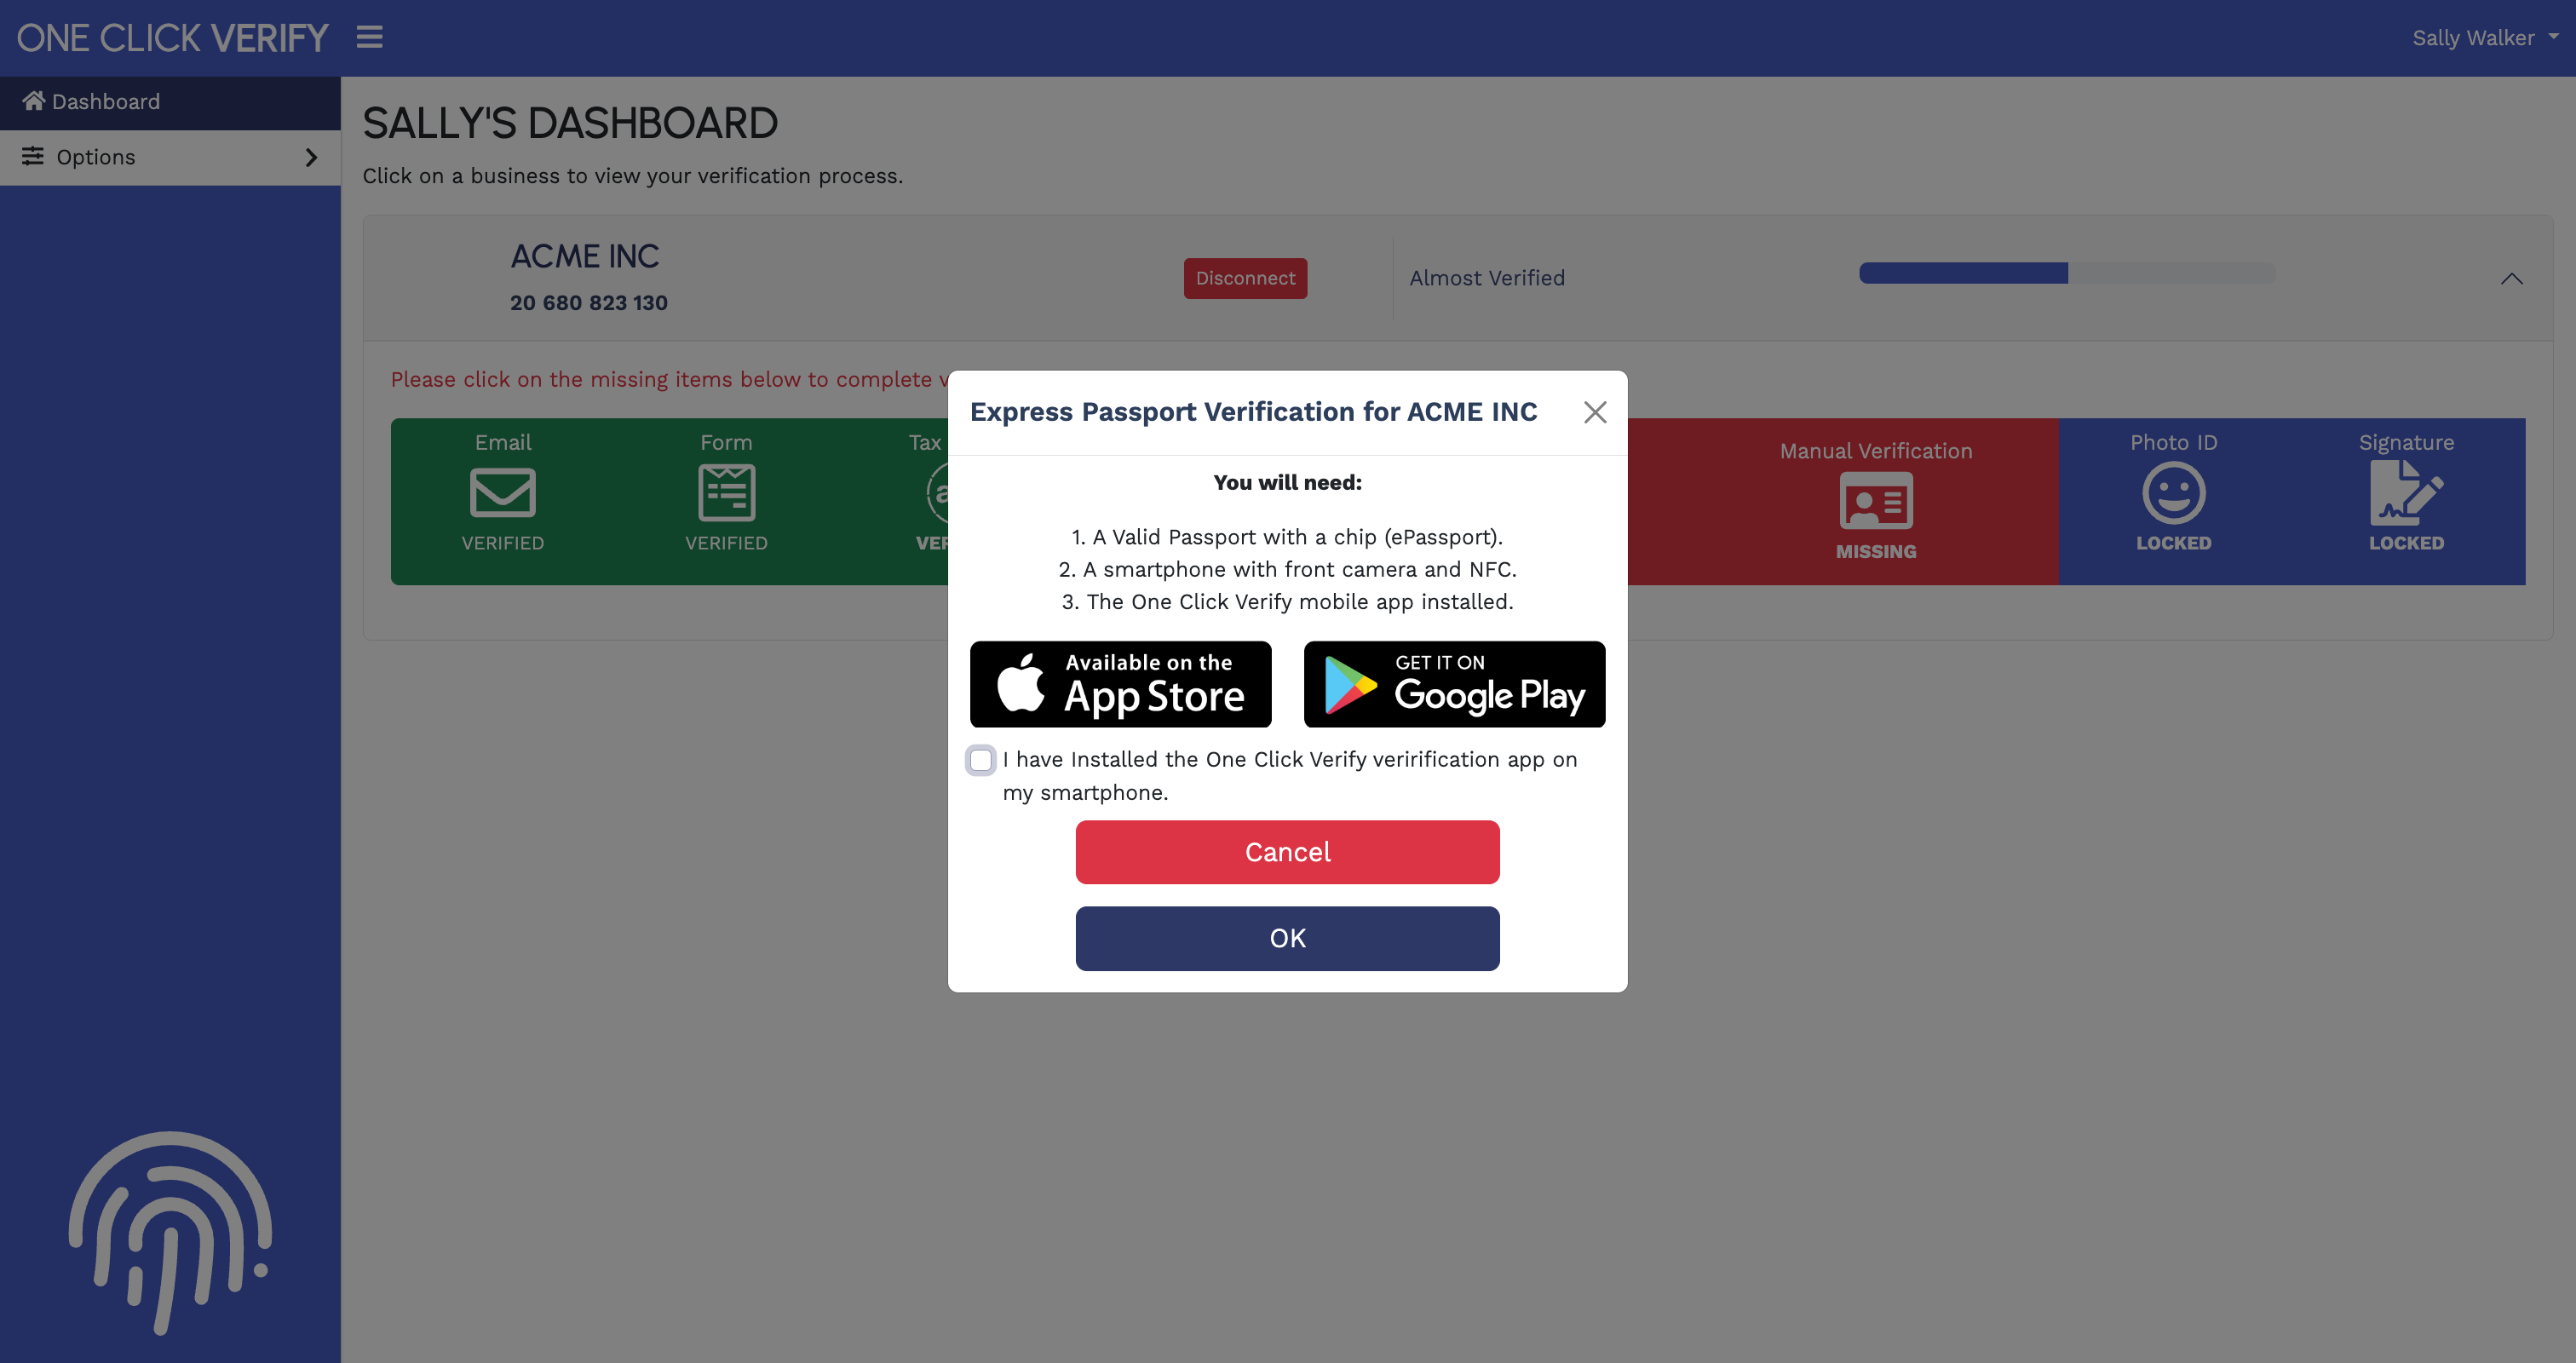
Please refer to the example below, which depicts a typical dashboard that would be presented to a client before proceeding to the mobile application.

To download the One Click Verify mobile app, search for “One Click Verify” on Google Play or the App Store, as demonstrated below.


The following depicts a typical dashboard that would be presented to a client on One Click Verify mobile application.
You will need to complete either “Express Passport Check” or “Manual Verification” before the “Photo ID” section will be unlocked to you.

Click on the “Express Passport Check” button as shown below, scan the QR code within the app, and follow the prompts.

Following on from that, ensure your mobile’s camera is enabled for One Click Verify in order to capture your passport details, as shown below.

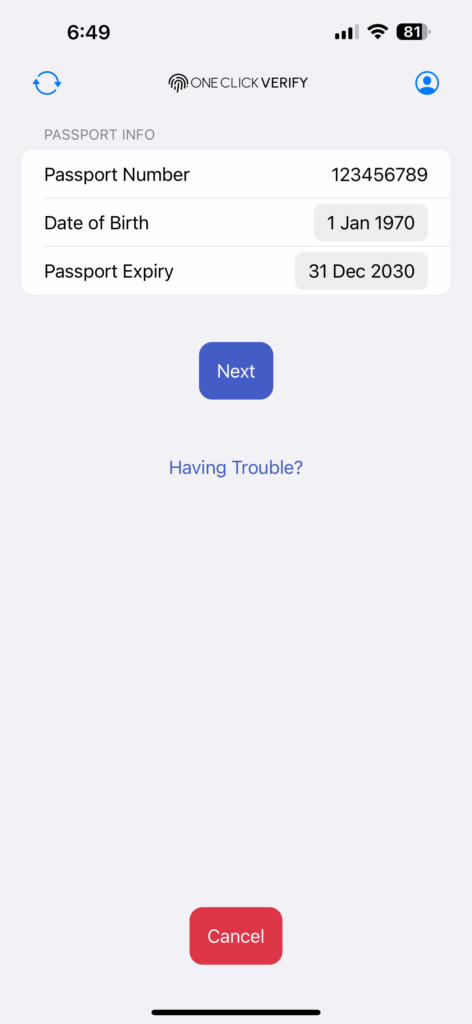
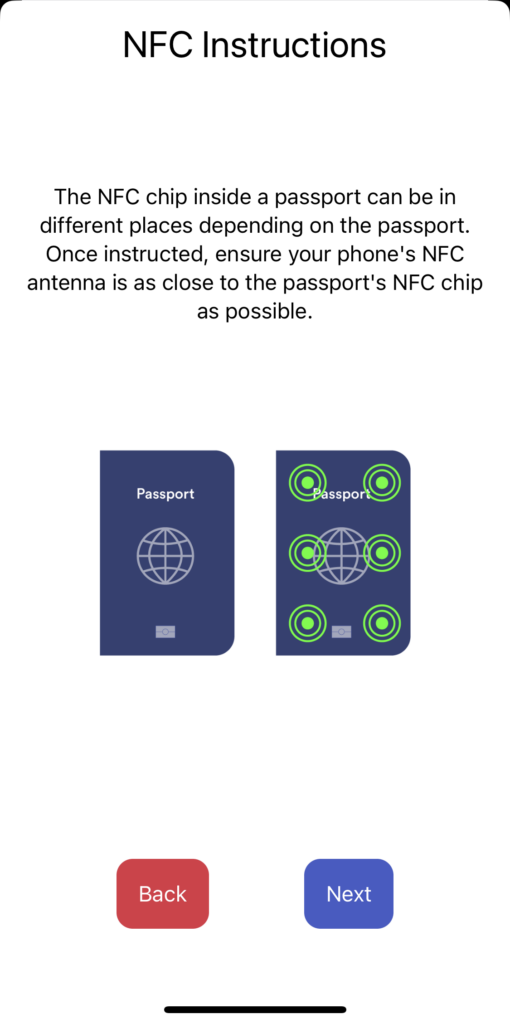
After capturing your passport details, follow the instructions below to read the NFC chip on your e-passport.


A notification will appear once your passport has been successfully read. It will then prompt you to complete a live facial authentication.


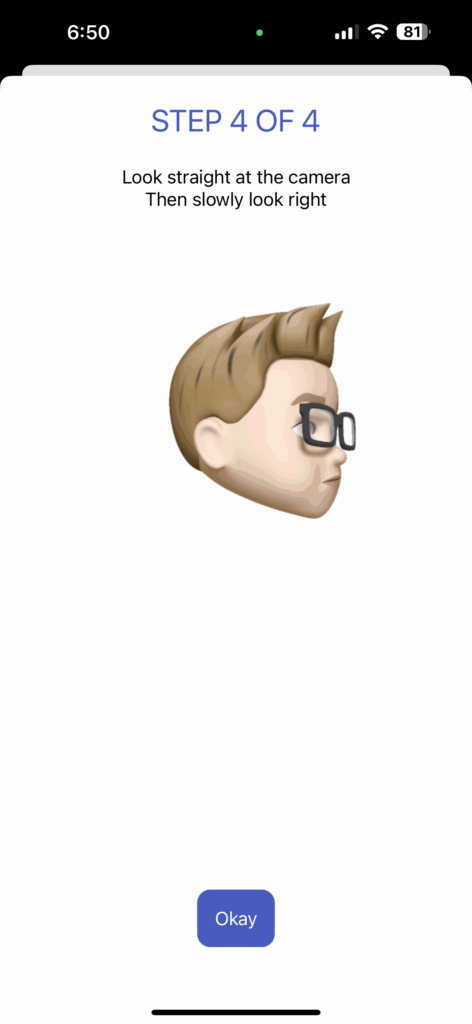
Biometrics Authentication
To complete the live facial authentication, follow the steps below.


Manual Verification
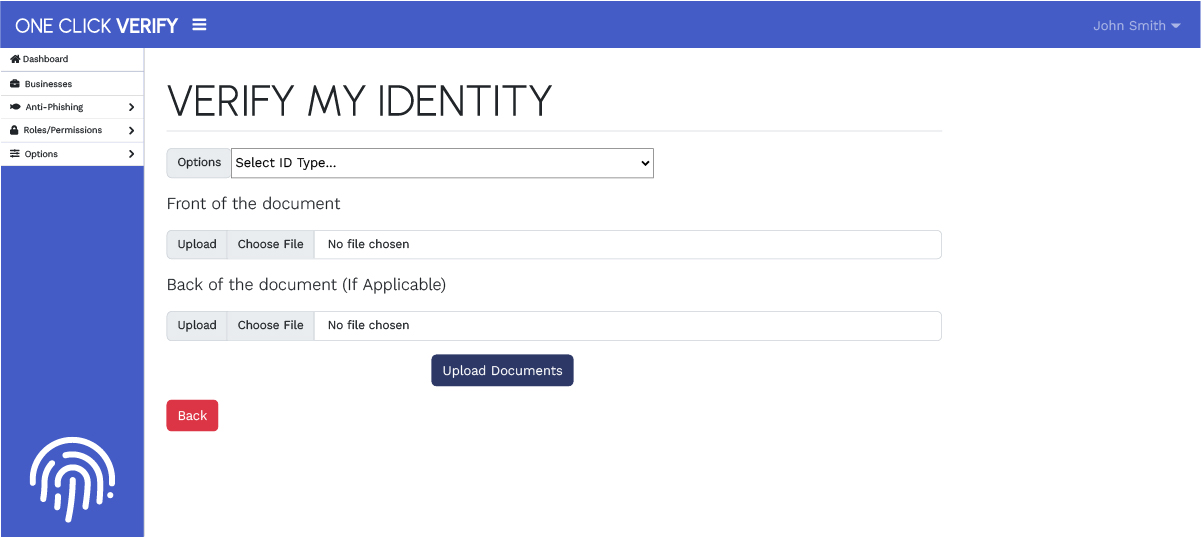
Should NFC fail, or you would prefer to take this path, you may also verify yourself using manual verification.
Click on the “Manual Verification” button as shown below and follow the prompts.

Following on from that, you may enter your details manually in section demonstrated below.
After completing the manual verification process, the “Photo ID” section will be unlocked and highlighted in red as shown below.


Photo ID
The “Photo ID” section will be unlocked once you have completed manual verification. Select the “Photo ID” button as shown below.

Complete the Photo ID process by uploading your most recent photograph. Alternatively, you can take a photo with the camera on your mobile phone.
After completing the photo ID section, the “Photo ID” button will appear as green as demonstrated below.


Common Issues
Common issues clients are presented with are:
- NFC not reading – please cancel the process and complete the manual verification path.
- Email address or mobile not matching the email or mobile set up in the initial invitation – please contact the business to update and resend the invitation.
- Name doesn’t match the name set up in the invitation – Please fill out your name as known by the requested business or contact the business to update the name which matches your identity documents.
- Android application blocking uploads – We are aware of the issue and look to resolve soon. In the meantime, please use the web portal at https://www.secure.oneclickverify.com.au to complete the verification.
- Password not working / reset not sending – most likely cause is you have not got an active account. Please make sure you have registered following the link supplied by your business.
Client Failed Document Verification Check
If a client is unable to pass primary ID verification for whatever reason, they are able to upload supporting documents to be manually verified. Note: the file format must be png or jpg and less then 5mb each.